People love to bake during the holidays. Pies, cakes, cookies, you name it. The holiday season turns into the baking season.
According to one survey, the holiday baking tradition is as essential as decorating the tree, listening to holiday music, and watching holiday movies. Sugar cookies, carrot cake, and pumpkin pie top most lists of seasonal favorites, though personally, I reach for yellow cake with chocolate icing, cream cheese Danish, and scones.
While sweets make great treats, I’d rather have bread instead.
Baking bread, in many ways, is like chemistry. The measurements must be precise for the bread to come together correctly. You have to be patient as the bread rises. A more complex bread, like sourdough, needs a starter you have to feed daily, and it takes about a week before it’s ready.
Why go through all that when you can buy bread at a local store?
Big box stores and grocers bake and sell bulk bread, meaning there’s little difference between French and Italian bread and rolls. Corner bakeries typically have a variety, with baguettes that are distinctly different from ciabatta, which is different from farmhouse bread.
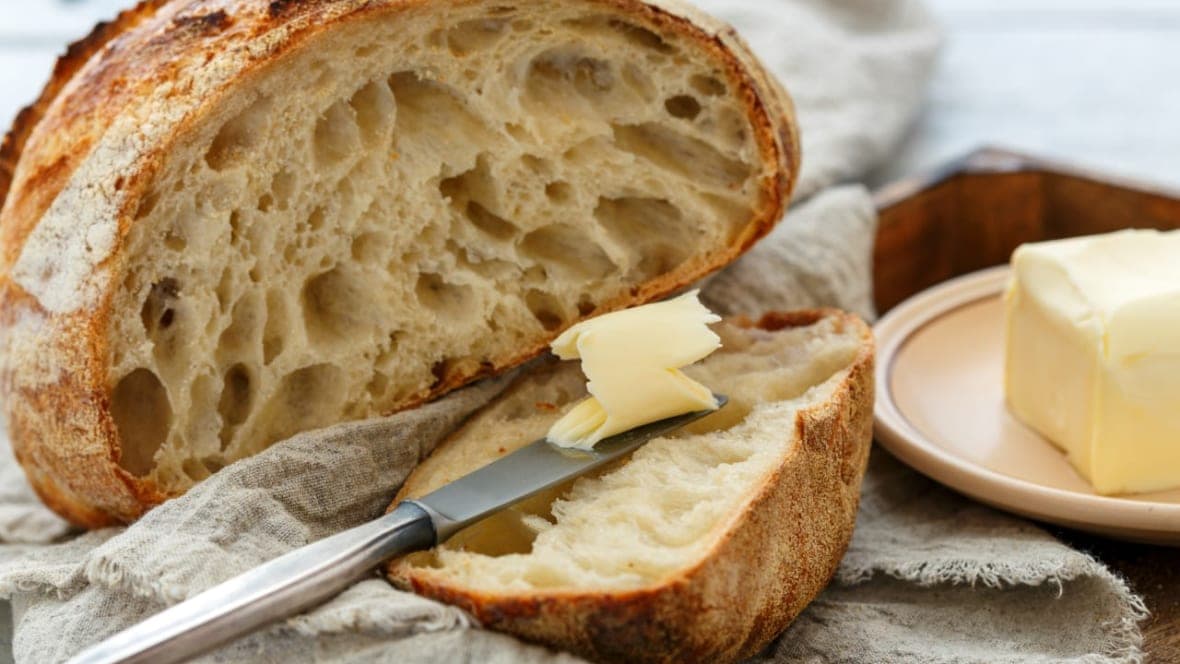
Unfortunately, those delicious shops are more challenging to find than they used to be, and bulk bread doesn’t appeal to me. That’s why I make my own. The house smells great, and as soon as that freshly baked bread cools, a slice slathered with butter or jam makes a fantastic snack. It also looks great on a charcuterie board. (I love to spread goat cheese and fig jam on fresh bread). There’s also a sense of accomplishment as the family wonders when you developed such a skill.
Before we get to the easy bread recipe, there are a few things you should keep in mind when baking a loaf.
Use all-purpose flour
You can use all-purpose flour for any baking. I use it for bread, pasta, pie crusts, etc. Some bread recipes suggest using bread flour, but it’s not necessary. All-purpose flour has between 9 and 11% protein, and bread flour contains as much as 13%. In short, this means bread flour makes a more dense and chewy loaf. As a home baker, I find all-purpose easier to handle. Besides, I have limited cupboard space and could take up half the kitchen with all the different flours on the market.
Do not use self-rising flour
Years ago, I made a rookie mistake and tried to make bread using self-rising flour, which was a disaster. Self-rising flour already contains baking soda, a leavening agent. Adding yeast makes the dough rise too fast, and the bread collapses while cooking. Self-rising also has a lower protein content at about 8.5%, making it suitable for foods with a more tender crumb, like pancakes, waffles, and cornbread. If you keep both on hand, make sure you clearly label the self-rising from the all-purpose, so you don’t make the same mistake I did.
Don’t use hot water
One sure way to kill your bread before it starts is by adding yeast to hot water. Water above 120 degrees kills yeast, so your bread won’t rise. Warm tap water at 95 to 100 degrees is all you need.
Use sugar in your yeast
Sugar helps activate the yeast, so adding at least a teaspoon is important because it will assist in the fermentation process.
Instant vs. active dry yeast
Instant yeast, also known as rapid or quick-rise yeast, dissolves faster. You also don’t have to add it to water for it to dissolve. You can mix it in the flour and stir with lukewarm water. With active-dry, you’ll need to proof the yeast first by placing it in the warm water with sugar, mixing it, and letting it sit for about 10 minutes until the yeast activates. Most home cooks prefer instant yeast because it’s faster and easier.
Double rise
I always double-rise my bread and roll dough. Yes, it’s time-consuming, but the double-rise makes the crumbs light and tender. After you make the dough, let it sit until it’s doubled in size, about an hour. Punch it down and let it rise a second time, about another 45 minutes to an hour. Then you’re ready to rock.
Now that you know the basics, let’s bake!
It’s easier than it sounds.
Here’s my basic bread recipe. You need five ingredients and can make it by hand. You can use a mixer if you’re more comfortable.
BASIC CRUSTY BREAD
INGREDIENTS
2 ½ cups all-purpose flour
1 teaspoon salt
1 ¼ cup lukewarm water
1 teaspoon instant (rapid rise) yeast
1 teaspoon sugar
As precisely as possible, measure 2.5 cups of flour. Sift the flour and add to a large bowl.
Add the salt, sugar, and yeast to the flour and stir until combined. Add the lukewarm water to the dough, and mix the ingredients using the back of a wooden spoon. At first, the dough will seem dry but keep stirring until a ball forms. The dough should ultimately become wet and sticky. If you need to, dust your hands with flour and knead the dough for a minute or so until it becomes smooth.
(Instead of stirring, you can also use your mixer and combine the ingredients until a ball forms.)
Let the dough rise for about an hour or until it doubles in size. Punch down and let the dough rise again, another 45 minutes to an hour.
There are two methods for finishing the bread
- The more complicated method: In a Dutch oven
- Add a sheet of parchment paper in another bowl that overlaps the sides.
- Punch the dough, shape it until a ball, and place it in the parchment paper bowl.
- Cover with a towel and let rest. Meanwhile, place a covered Dutch oven in a 450-degree oven for 45 minutes
- The Dutch oven will be very hot, so be careful. Using a good quality oven mitt, remove the Dutch oven’s lid.
- Place the parchment paper containing the dough into the Dutch oven and cover it with the lid. Let the bread cook for 35 minutes, take the lid off, and continue cooking for another 10 minutes.
- Remove the bread from the Dutch oven and let cool for about 30 minutes before slicing
- The easy method: On a baking sheet.
- Preheat the oven to 450 degrees
- Place a silicon baking mat on a baking sheet; parchment paper will work, too
- Punch down the bread, place it on the silicon or parchment, and shape it into an oval or round. Cover with a towel and let it rest until double in size, 45 minutes to an hour
- Remove the towel and score the bread in the center. It’s easiest to use a kitchen shear and give the bread one good snip of about two inches long.
- Place the baking sheet in the oven. After 20 minutes, add melted butter on top of the bread. Check it in 10 minutes and continue to cook until well browned.
The easy method is extra easy once you get the hang of it. Once you do, you’ll start baking bread more than you thought you ever would.

Ray Marcano is a longtime, award-winning journalist who has written and edited for some of the country’s most prominent media brands. He’s a former national president of the Society of Professional Journalists, a two-time Pulitzer juror, and a Fulbright Fellow.
TheGrio is FREE on your TV via Apple TV, Amazon Fire, Roku, and Android TV. TheGrio’s Black Podcast Network is free too. Download theGrio mobile apps today! Listen to ‘Writing Black’ with Maiysha Kai.
